


Increasingly, the world is turning to and embracing the smartphone platform as its favorite digital device. People not only use smartphones for voice communication, but also for web services, email, SMS, chat, social networking, photos, payment services, and so on.
There are 2.6 billion smartphone subscriptions in the world today, and that is expected to grow to 6.1 billion by 2020 (there are 7.3 billion people in the world, so about one smartphone per person). This means that the smartphone will be the victim of choice for hackers, as it can extract a lot of information about the person who owns it and it can be a hack into the company's network.
Don't Miss: Turn windows into a Hacking Machine ? Hack anything with Windows
In this series, we will explore hacking methods for smartphones, which will vary by operating system type (iOS, Android, Windows Phone, etc.). Since Android is the most widely used operating system (now 82.8%), it makes sense to start there. Finally we will test Apple iOS login (13.9%) and Microsoft Windows Phone (2.6%). I don’t think it makes sense to waste time on the BlackBerry app, as it only owns 0.3% of the market, and I don’t expect it to last much longer. Also, its latest device runs Android anyway.
In this first installment, we will be creating a secure environment where we can test various hacks. First, we will build some Android devices. Second, we will download and install the Smartphone Pentest Framework. This framework, sponsored by DoD and developed by Georgia Weidman, is an excellent tool for creating and testing exploitation targeted at smartphones.
Let's start by building and deploying Android devices that serve as goals.
Step 1 : Open the Terminal
Just, to get started, burn Kali and open the terminal.
Step 2: Install Required Libraries
To use these Android devices on Debian 64-bit operating systems (e.g. Kali), we will need to install key libraries that are not installed by default. Fortunately, they are all in the Kali warehouse.
kali> find and install lib32stdc ++ 6 lib32ncurses5 lib32zl
With these 3 libraries installed, we can now proceed with the installation of the Android Software Developer Kit (SDK).
Step 3: Install the Android SDK
With your Iceweasel browser in Kali, navigate to the Android SDK website and download the Android SDK tools. Make sure you download the Linux kit. You can download and install Windows or Mac kits and test those Kali devices, but that will make things a lot harder. Let's keep it simple and put everything in Kali.

Once you have downloaded it, you can download it with the GUI archive tool in Kali, or with the command line.

Step 4: Navigate to Directory
Next, we need to go to the SDK directory.
kali> cd/android-pentest-framework/sdk/tools

Once we have the tools guide, we can use the Android app. Just type:
kali> ./android

If you do, the SDK Manager will open a GUI similar to the one above. Now, we will download two versions of the Android app to customize our smartphone login, Android 4.3 and Android 2.2. Make sure you find them in the middle of this list, click the box next to them, and then click the "Install XX Packages" button. This will enable the SDK to download those applications to your Kali.
Step 5: Android Virtual Device Manager
After downloading all the packages, we now need to build our Android Virtual Devices, or AVDs. From the SDK manager shown above, select Tools -> Manage AVDs, which will open an interface similar to the one below the Android Virtual Device Manager.

Click on "Create," which will open an interface similar to the one below. Create two Android Virtual devices, one with Android 4.3 and one with Android 2.2. I simply called my devices "Android 4.3" and "Android 2.2" and recommended that you do the same.

Select the Nexus 4 and Target Device (API 18 for Android 4.3 and API 8 for Android 2.2) and "Skin with dynamic hardware controls." All other settings should be left in the default value, without adding a 100 MiB SD card.
Step 6: Launch Android Virtual Device
After creating two Android Virtual Devices, the Android Virtual Device Manager should look like this on two devices:

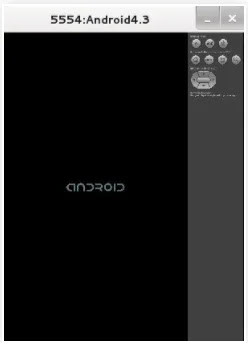
Continue to highlight one of the visible devices and click on "Start."

This will start the Android emulator in building the Android Virtual Device. Be patient here - this can take time. When done, you should be greeted by a visible smartphone on your Kali desktop!
Step 7: Install Smartphone Pentest Framework
The next step is to install the Smartphone Pentest Framework. You can use git clone to download it from:
kali> git clone github.com/georgiaw/Smartphone-Pentest-Framework.git

Step 8: Launch Apache Server
As it will require a web server and MySQL data, go ahead and start both services:
kali> service apache2 start
kali> service mysql start

Step 9: Edit the Config file
In almost all applications for Linux, the Smartphone Pentest Framework is equipped with a plain text configuration file. We need to start heading to the direction with the console's sub-directory:
kali> cd /root/Smartphone-Pentest-Framework/frameworkconsole
Then open the configuration file with any text editor. In this case, I used Leafpad:
kali> leafpad config

We will need IPADDRESS flexible configuration and SHELLIPADDRESS variables to display the actual IP address of your Kali system (you can find it by typing "ifconfig").
Don't Miss: How to Know Phone is Hacked or Not
Step 10: Start Framework
Now, we are ready to launch the Smartphone Pentest Framework. Just type:
kali> ./framework.py
And that should open the draft menu, like the one below.

Now we're ready to start hacking Smartphones!
In future tutorials on this series, I will show you how this framework is used to hack / exploit smartphones. So keep coming back, my novice attackers!


0 Comments